Wanda Gene's Musings on Life, Love and Loving the Quilting Life!

Tuesday, November 29, 2011

Further Adventures with Orca Bay

Wow--

I have been coming along with my little blue strippies.  At least these pieces are 3 1/2" (but finish at 3").
These are really fun to make...and I have  made 72 easily before feeling the need to switch to something different.  Here are my blue strippies:


In the pic they are not yet trimmed but now they are.  I am in the process of removing the paper foundations also.

Now I can go back and finish last week's step.  I had about 3/4 of the first week's units finished when putting on Thanksgiving Day dinner for 15 relatives and friends slowed me down, quilting-wise.

You know, it's funny, I have been working on some little crumb blocks that remind me of these blue strippies.


The crumb units are also 3 1/2" unfinished and I used 4 to each block.  These were made for my Doctor Who quilt.  It is sashed and bordered in TARDIS blue.  As soon as I get it bound and photographed I will share it with you.

Many thanks to Bonnie for her Orca Bay Mystery Quilt


.
 

My First? Quilt

Hi--

All of us who call ourselves quilters had to start with that first quilt.  Whether we started with a quilted pillow, a wallhanging, a crib quilt, a miniature quilt or we went straight to that most intimidating sort of the quilt....the BIG bed quilt, there was always the one we remember as our first quilt.

First quilts are rarely masterpieces.  Quilters who start their first to be a masterpiece rarely finish.  Or if we do, a few years later we realize that our concept of a quilted masterpiece has evolved into something quilte different.  Usually our first quilts are homely little projects with  strange combinations of colors and fabrics that do not play nicely together. 

My first was no different.  I wish I could show it to you!

But that brings me to a dilemma.  I can write about my first quilt (circa 1969), but it bit the dust long ago, a victim of being loved to death.  No pictures exist, and if they did, they certainly would not be digital.  And yet....and yet, I believe that pictures make to blog come alive.  We quilters are such visual creatures.  So hang in there, I do have pictures of my oldest surviving quilt!

Anyway, when I was 20 years old, about to be married and having never made a quilt before, I started a king size quilt for me and about-to-be DH.  I bought (from the La Mirada swapmeet, no less) some factory cutaways (remnants) that were a little heavier than broadcloth.  I cut the fabric into random rectangles, all 6" by whatever I could get.

These rectangles were joined into horizontal rows, and the rows were stitched together.  This sort of reminds me of what I make for pieced backings nowadays!  It was a brick quilt, but with REALLY big bricks.  It was layered with a polyester batting and a big flat sheet.   I tied the quilt with yarn and turned under both back and front edges and whipstitched.  We used it for a bedspread for years.


Aw, isn't that cute?  That's what I thought in 1975 when this picture with the accompanying pattern appeared in Woman's Day magazine.  It only took me three years to make, but I did finish my third quilt. (Number 2 also wore out eventually).  This is my son Jeff's quilt.


How about those 70's colors?  Looks a little dated maybe?  Oh, can you see that stripey fabric in green, gold and brown?..... that is leftover from the *actual* first quilt.   And the hand quilting is so far apart as to be ridiculous.   Okay, but the puppies are still cute as ever.  And this quilt still exists.


I even documented the quilt with my embroidered signature and the year.  Because I I loved making this quilt, I still love it, and I love the little boy (who is now a man) that I made it for.


Monday, November 28, 2011

A Day for Showing Respect for a Fine Lady

Hi Folks,

I was going to write about my progress with Bonnie's mystery and about my first quilt, but life has gotten in the way, so I am going to write a bit about my DH's DM (Dear Mother).

She passed away this morning after a very difficult 1 1/2 years of slowly deteriorating health after falling and breaking her hip and arm. We spent all day yesterday with her, most of her children and another DIL, and the hospice nurses in the nursing home. She was in a sort of coma, but the nurses said that she could probably hear us talking. So talk we did. Some to her, and a lot to each other. Lots of holding her hand and gently pushing her hair back. Someone said that she got to be at her own wake.

The nurses told us that all her signs indicated that the end was very near. They were so gentle and loving with her, such as when they moistened the inside of her mouth with a sponge applicator.

Barbara was a great lady who was kind to all who knew her. She accepted me into her family when I married her first born son. When my own first child was born she sent a family member pick up our dirty laundry and drop off yesterday's freshly washed each day. She understood that I was having a tough time and feeling completely overwhelmed.

We occasionally took trips together, her and my DH and kids. Even in close quarters we always got along. My sons Jeff and Ed adored their grandma, of course. She took my little Eddie for a week when his brother Jeff was born, and she took both boys (and our dog) for 10 days so DH and I could go to Hawaii one year.

She was very fond of our German Shepherd Dogs that I had (one at a time) over the years. Personally, I consider that the ultimate test of good character in a person if they like my dogs. After all, my dogs are wonderful, smart, kind-hearted, and fiercely loyal. If a person somehow cannot see any of those doggy virtues, there must be something wrong with THEM.

I remember when we were getting our house ready to sell about 20 years ago. Grandma was in there with us painting the floor trim. That was so typical of her, always there when you needed her.

We are going to miss her: Mother, Grandma, Helper and Moral Compass of our family.


Monday, November 21, 2011

Mysterious Goin's On over at Quiltville!


Hi Y'all!

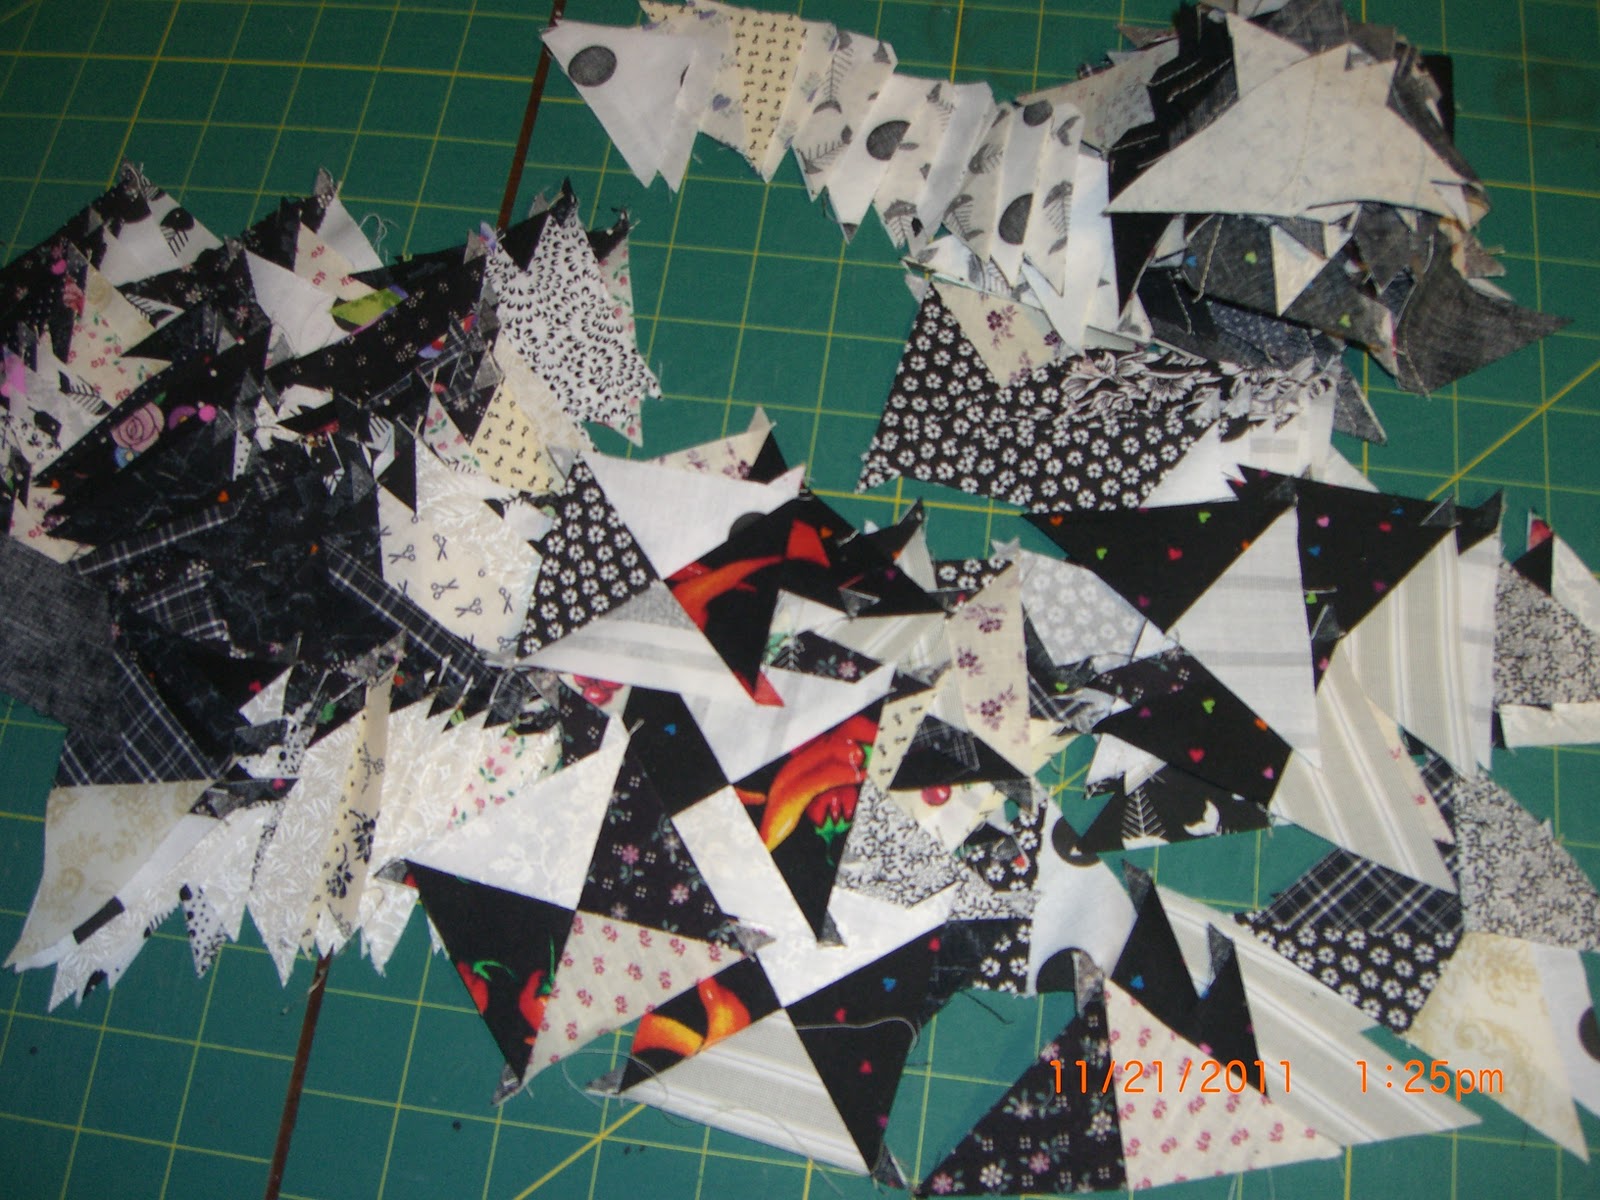
This glorious mess on the right is what I am doing to follow Bonnie Hunter's new mystery quilt, ORCA BAY.

I have tiny hourglass units in all stages of completion (including a few more that still need cutting out).  These babies will finish at 2"....oh heavenly days, am I really making anything this tiny?  I guess I am committed because you can see the evidence right here.

I do hope that the next step will be a little easier, but knowing Bonnie, I'm not counting on it.

I decided to just follow Bonnie's suggested color scheme of black, red and blue instead of coming up with another set of colors.  Mostly because I like these colors for a quilt....so we'll see how it comes out in the coming weeks.

Every Friday, she will publish another step in the mystery.  This past Friday was the first step, except for the post where she introduces the mystery and gives us some idea of yardage requirements, suggested color scheme and so forth.  I had already pulled strips out of my bins and this weekend I was cutting and sewing like crazy.

I don't keep strips in 1 1/2", but I do keep 2, 2 1/2, 3, 3 1/2, 4, 4 1/2, 5, and 6 inches.  I found that I could cut 1 1/2" from a 4" strip and the leftover goes in the 2 1/2" bin and so on.  As long as I could cut 1 1/2" from any strip and have a leftover that is in a size that I keep, that works for me.  I find that doing this makes my strip bins even more versatile.

I have gotten this far without cutting into any fabric other than my strips.  I plan to press and cut into a few fat quarters to get the rest this afternoon. 

I hope you will check out Bonnie's blog and maybe cut, sew, piece, and quilt along with all of us who love all of her designs.


Sunday, October 2, 2011

What I Did on My Blogger Vacation

Hi All,

So sorry to be such slacker in the blogging department.  I have been having computer/blogger/photo/solar flares problems...that means that I have no idea what has been causing it.

So I just gave up a few times.  Thought I would try again....sometimes time heals wounds even with computers.  Not very often but occasionally.

So far, so good, today.

Uh-oh.  Actually not so good.  Loading picture trouble big time.  Now my computer cannot even recognize my camera docking station as another drive.  This is where I call in the cavalry in the form of my DH.  We'll see what he can figure out.

Now I'm back again.  DH took the memory card out of the camera and inserted it directly into the computer.  He is so clever!  I did not know how to do that.  I guess I had a vague idea but when it comes to computers that doesn't even buy you a cup of coffee to spill on the keyboard!  DH thinks that maybe the docking station or cables are bad.

I have actually taken a little time off from quiltmaking. Well, this is my temporary break, or rather a DETOUR, away from quilting, just for a couple of weeks.  This is a lovely task that I work on every couple of years or so.  I hate to shop for nightgowns and it is so much easier by far to just make them.

Especially when you have an oldie-but-goodie pattern that you've made dozens of times and, of course, it always fits!  So I turn them out almost on the assembly line.  I made FIVE comfy and pretty nighties.  It took about 2 1/2 days each (one day for cutting, one day for sewing, and the 1/2 for processing the scraps into strips, changing thread colors on my Bernina and serger, and generally cleaning up.

One of the best results of nightie making  is massive stash reduction!  Oooh, each one uses up 3 1/2 yards of beautiful quilting fabric that I can now WEAR!  My total damage to the stash is 17 1/2 yards!  That means that I can replace it, of course! There is some fun fabric shopping in my future!

Here are the results (I'm taking a deep breath now):


Here are two of them.  The other three are identical except for different fabric, of course.


Here is a close-up of the neckline detail of another one.  Yes, I made two pink ones out of slightly different prints. The neckline and the sleeves are finished with a binding technique that I learned in Stretch n Sew class in the 70's (lots of us remember that class, don't we?) that was called Chanel trim.  Basically it is a binding finish that is turned under on only one side.  It results in a feather-light finish compared to using bulky, uncomfortable facings.  Chanel trim is often found in RTW.

Here is how it works:


Start with 1" wide BIAS strips that are long enough to finish the edge that you are working on.  I finish the side that goes on the inside on my serger.


Then sew RS's together to the garment edge, fold to the back and ditch-stitch on the front. Easy as pie!


My photo could be a lot clearer, but this gives you the idea of what the finished edge looks like.  I mention this technique because you won't find it in the pattern since it is my own adaptation and I love it!

Next I will be making some backings for some tops that need quilting.  And also having lovely dreams of traveling in the TARDIS with Doctor Who and his friends....


Wednesday, July 20, 2011

A Couple of Hot Tips for Today!

Hey Ya!

Quite a few years ago I used to read a newspaper with a column by a writer who called herself  Miss Hot Tips.  She not only used that moniker for her byline, she also referred to herself in the third person.  So it was Miss Hot Tips thinks this, and Miss Hot Tips has this to say.  Anyway, it was just too cute....enough to make a person gag.

So, I don't want anyone have esophageal distress over my little post, so I WILL NOT be Miss Hot Tips.  But I do have some piecing tips  that I hope will improve your piecing skills and therefore add a little extra ray of sunshine to your quilting day.

Using Bonnie's business card as a sewing guide!

I learned this easy method of sewing along the diagonal of a square during one of my classes with Bonnie Hunter at Road to California last January.  One of the ladies in the class graciously shared this with us, and we all immediately became excited about it (including the teacher).  It was one of those Why-didn't-I-think-of-this moments.  Bonnie got out some of her business cards and cut a 45 degree angle with a rotary cutter and passed them out to all of us.  As you can see I am still using Bonnie's card!    I still like to have my blue tape on the machine which I line up with the bottom edge of the card. 

Now here is a little refinement that I have found that helps me even more.  I always cover with the card the part of the square that will be flipped, not the part of the square that will trimmed.  This helps offset my stitching line by about one thread's width, which is needed to allow for the "turn of the cloth."

Does your sewing machine give you the choice of needle up or down when you stop sewing?  I hope that most of you have that feature.  My 17 year old Bernina does.  When I chain piece, I always choose needle down and I never get thread nests when sewing the next piece.  If I choose needle up, sometimes the thread directly behind the needle becomes a little loose and then I get a thread nest.  The thread behind the needle must stay taut and having the needle down accomplishes this.  I just wish that needle down was the default on my machine and not the other way around!

Have a happy piecing day.

Friday, May 20, 2011

This Mama Got a Brand New Baby!!

Hi y'all!


My Most Recent Acquisition
 Well, she's new only to me.....How new can she be when she was minted about the same time I was (1948 to 1950)?  OK, now I've told the whole world how old I am...LOL!

It started innocently enough on Thursday when some little voice told me to check the antiques section of Craig's List.  I check occasionally but not everyday.  I always click on ads for "vintage sewing machine" just because I love to look at the pics of them.  Lo and behold, the ad opened to a picture of a beautiful perfect little featherweight!  Since the title had included $120 I was doubly gobsmacked to find a FW listed at that price!

Right away I sent a reply to the seller, asking to see the machine.  Apparently there is a problem with replying on Craig's List on our computers.  It says your e-mail was sent and then it says that it wasn't sent.  Just like a computer---infuriating.  I chose to believe the first but apparently the latter was the truth.  My DH told me about this problem a couple of hours later when I told him about the FW for sale.  I tried again, going directly into my e-mail account and copy-pasting the Craig's List code into the e-mail address.  This method worked fine.  But I didn't get a reply from the seller that evening so I figured he had been inundated with eager buyers.

Yesterday, he called me!  Yes, the machine was still for sale and, yes, I could go see it at 7:30!  WOW
DH and I drove over, it wasn't far.

She was a beauty.  But then my heart sank when I saw that there was no bobbin case.  I asked him about it, and he said that all he had was what was with the little FW.  Then I looked in a little box of accessories and found the bobbin case.  WOW, again.

A Great Little Accessory Case Came with It

Oh, I almost forgot to mention that the motor ran great.  I told DH in code that I wanted it.  The code is "I think this will do what I want to do with it."  He then had the NERVE to ask if the seller would take $100.  The answer was "Well, I guess so."  I was already getting out the money.


 This morning I spent some time cleaning her, making her shine again.  I put in a new needle, one drop of oil in the race, threaded her up and did a test sew-out.  The stitching was to die-for perfect!  And the sound she made while stitching was a contented, soft, "Tick, tick, tick."


Adhesive Gunk Left Behind
 Here is a project for me, removing all the gunk left behind after I removed the unsightly tape on the machine bed.  After this picture was taken, I took after it with WD-40 and removed about half of it.  More soaking and rubbing should do the trick.


A Successful Sew-Test!


At this point I decided to determine her birthdate.  I turned her over and discovered the oddest thing.
No serial number!  The AJ does give approximate date of manufacture, 1948 to 1950, but the rest of the plate where her unique serial number should be was as smooth as glass, totally blank!   I would love to hear from anybody who has seen this before.


Where Are the Missing Serial Numbers?

I am as happy as a cat in catnip, but I do have one problem.  I'm up to eight sewing machines now and three of them are Featherweights.  Maybe I won't look at Craig's List today.